
As you all might know the AWS billing model is pay-as-you-go. With this model, you will pay only for the services you need and for as long as you use them. Although this model has several advantages, one of its major disadvantages is that if you forget to stop or clean up the service you enabled, you will still be charged for the unused resources.
AWS also offers various services, which one can use as a modern orchestration tool for workflow automation.
In this blog, we are going to discuss how to use EventBridge and Lambda function service to control EC2 usage based on the user-defined custom matrix.
There are default AWS Lambda functions available specifically to start/stop instances at specific intervals which can be used in cases like to start/stop instances at non-office hours etc. In this post, we will discuss how to start/stop the instance based on custom user patterns like if the number of active connections exceeds the specified values [Say >30], then the instance should be started/stopped.
Table of contents
- Prerequisites
- Create an EventBridge project in python
- Create Lambda Function in python
- Create Event Bus in EventBridge
- Create Rule
- Running the application
- Conclusion
Prerequisites:
Make sure the following components are available in your environment.
- AWS Account
- AWS CLI
- Python 3.8
Step 1: Create an EventBridge project in python:
1. Open any code editor from the Linux/Windows machine in which you are planning to send an alarm to your EventBridge.
2. Then write an event bridge application in python and saved it with the name say: eventBridge-start-stop.py
import boto3
import json
client = boto3.client(‘events’,
region_name=’us-east-1′,
aws_access_key_id= < ACCESS_KEY >’’,
aws_secret_access_key=< SECRET_KEY >‘’)response = client.put_events(
Entries=[
{
‘Source’:’user-event’,
‘DetailType’:’user-preferences’,
‘Detail’: ‘{“instances”: “< InstanceId >“,”action”: “Stop”}’,
‘EventBusName’:’event-bus-testing’
}
]
)
print(response)
Note: Replace ACCESS_KEY and SECRET_KEY with your keys
Step 2: Create Lambda Function in python
1. Open the Lambda console. Choose Create function.
2. Follow the below steps to create a lambda function called event-bridge-lambda and select a Python application at runtime. Next, click on the “create function” button.

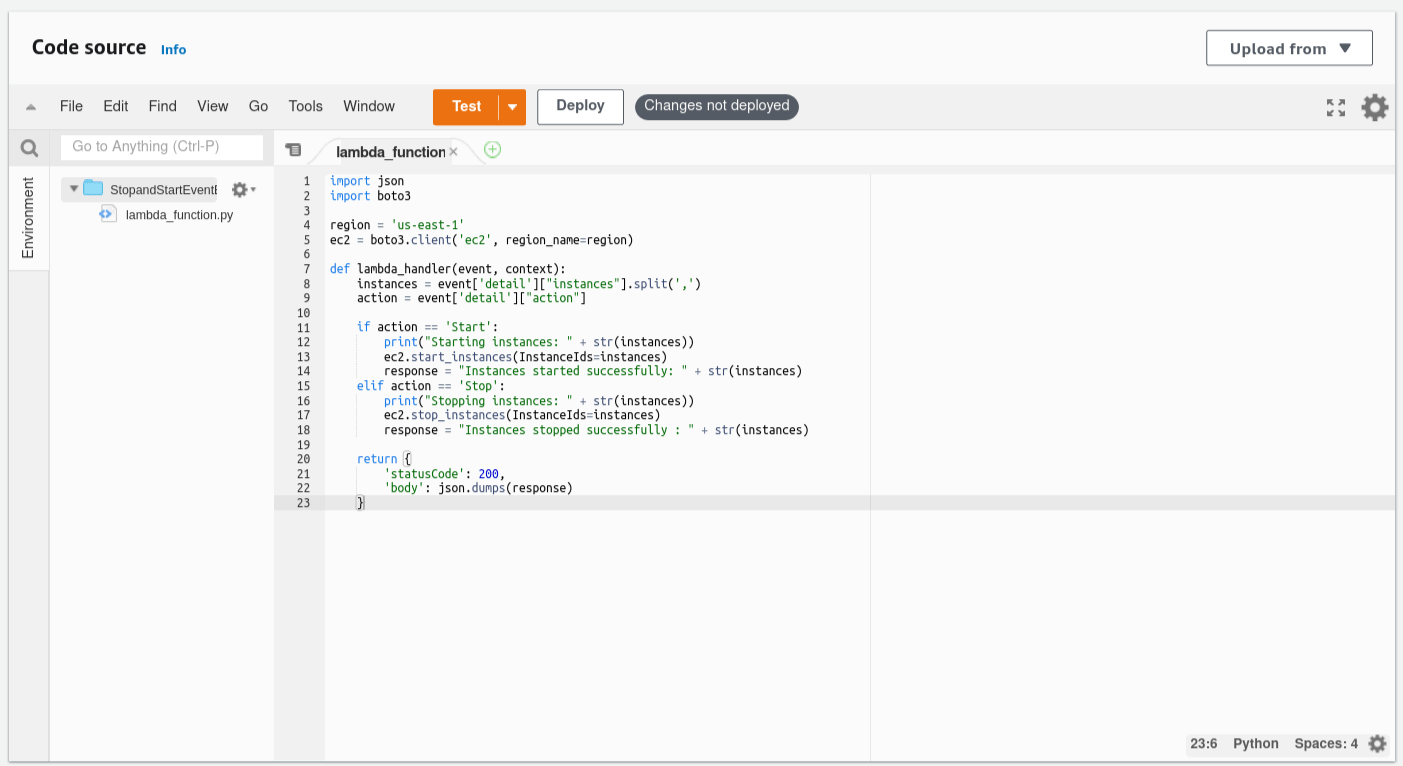
3. Next, Move to the lambda_function – In our case python code.
import json
import boto3region = ‘us-east-1’
ec2 = boto3.client(‘ec2’, region_name=region)def lambda_handler(event, context):
instances = event[‘detail’][“instances”].split(‘,’)
action = event[‘detail’][“action”]if action == ‘Start’:
print(“Starting instances: ” + str(instances))
ec2.start_instances(InstanceIds=instances)
response = “Instances started successfully: ” + str(instances)
elif action == ‘Stop’:
print(“Stopping instances: ” + str(instances))
ec2.stop_instances(InstanceIds=instances)
response = “Instances stopped successfully : ” + str(instances)return {
‘statusCode’: 200,
‘body’: json.dumps(response)
}
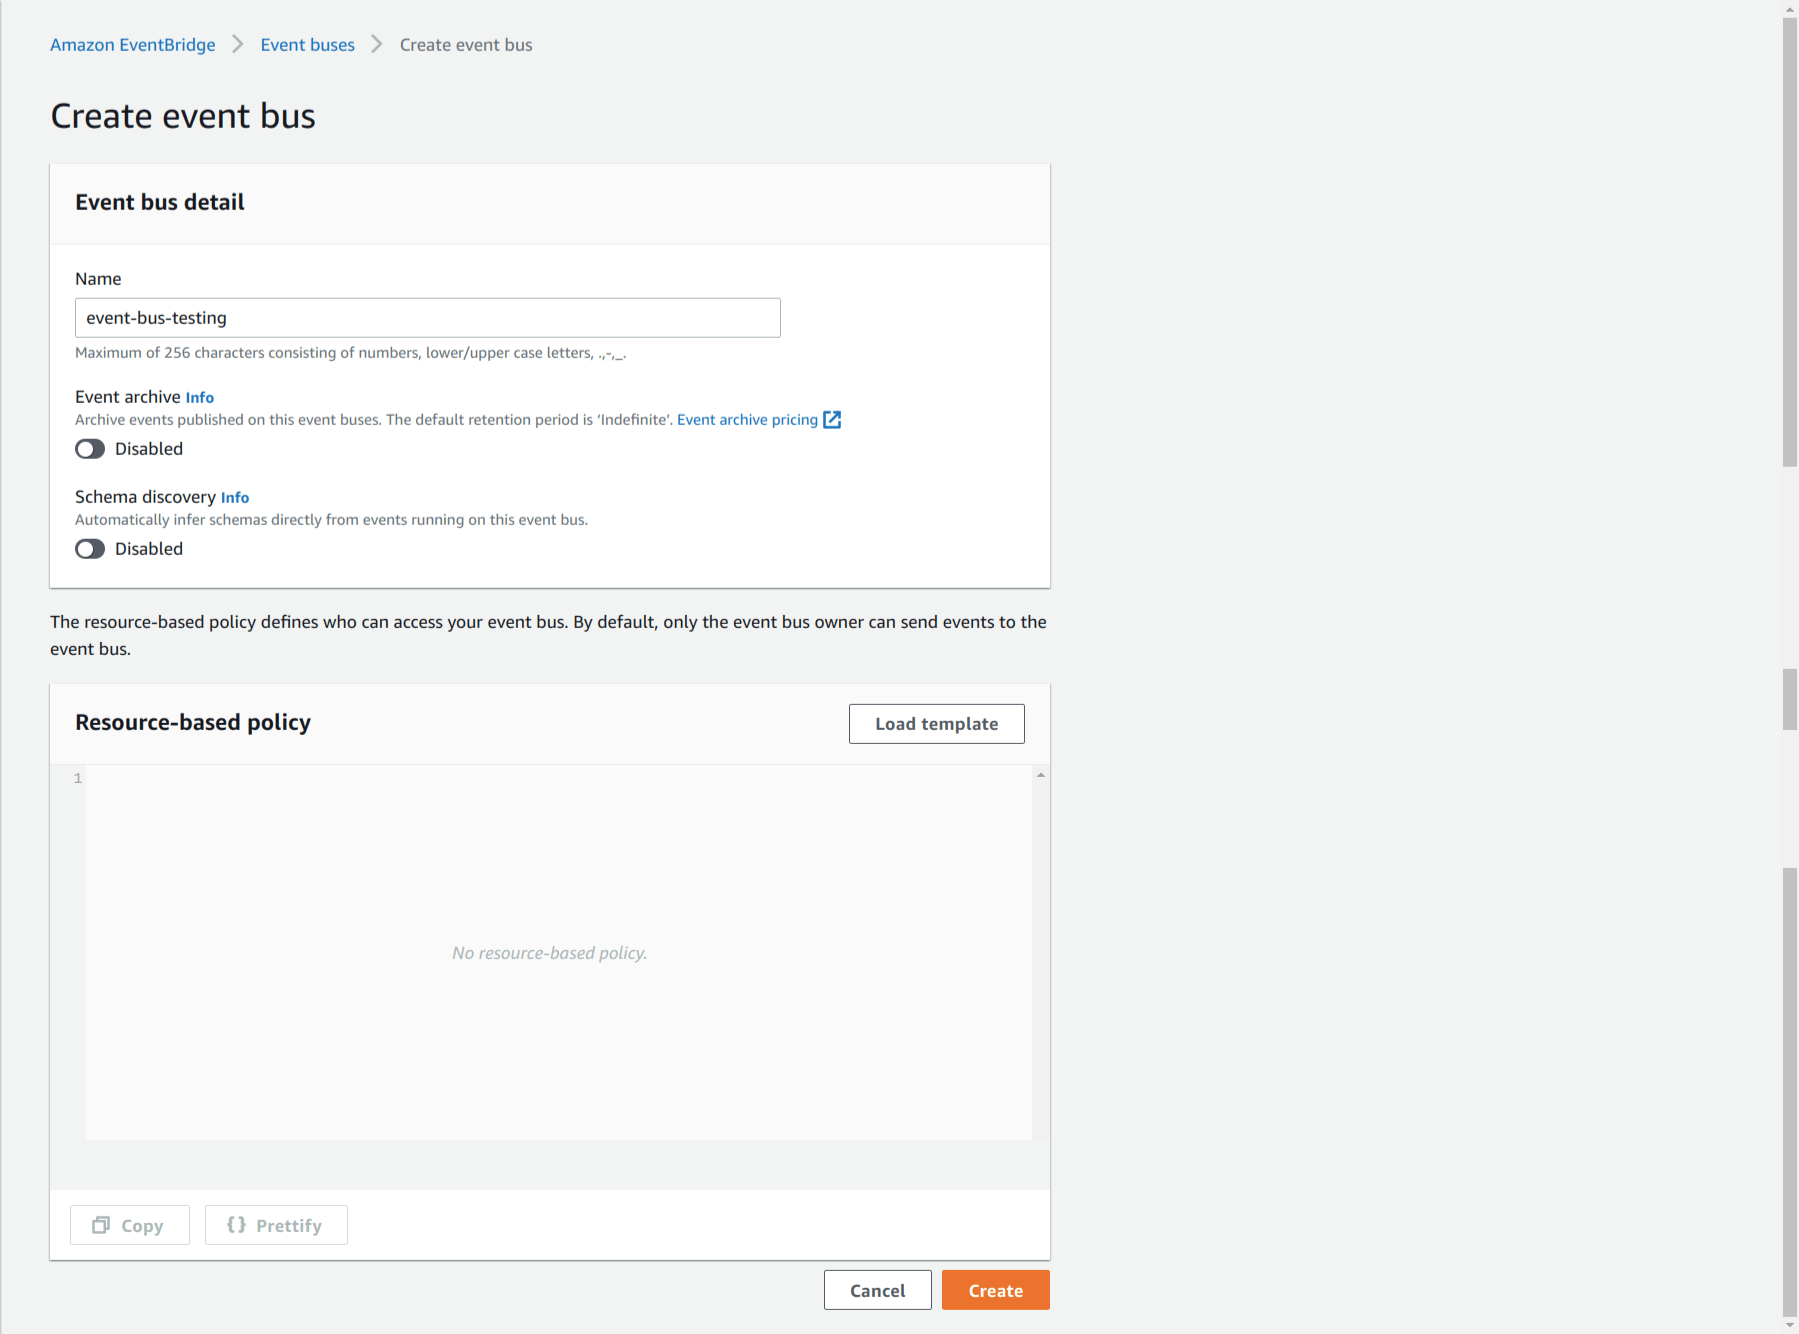
Step 3: Create Event Bus in EventBridge
1. Next step, go to the EventBridge resource. Then create a new event bus by clicking on the “Create event bus” button.

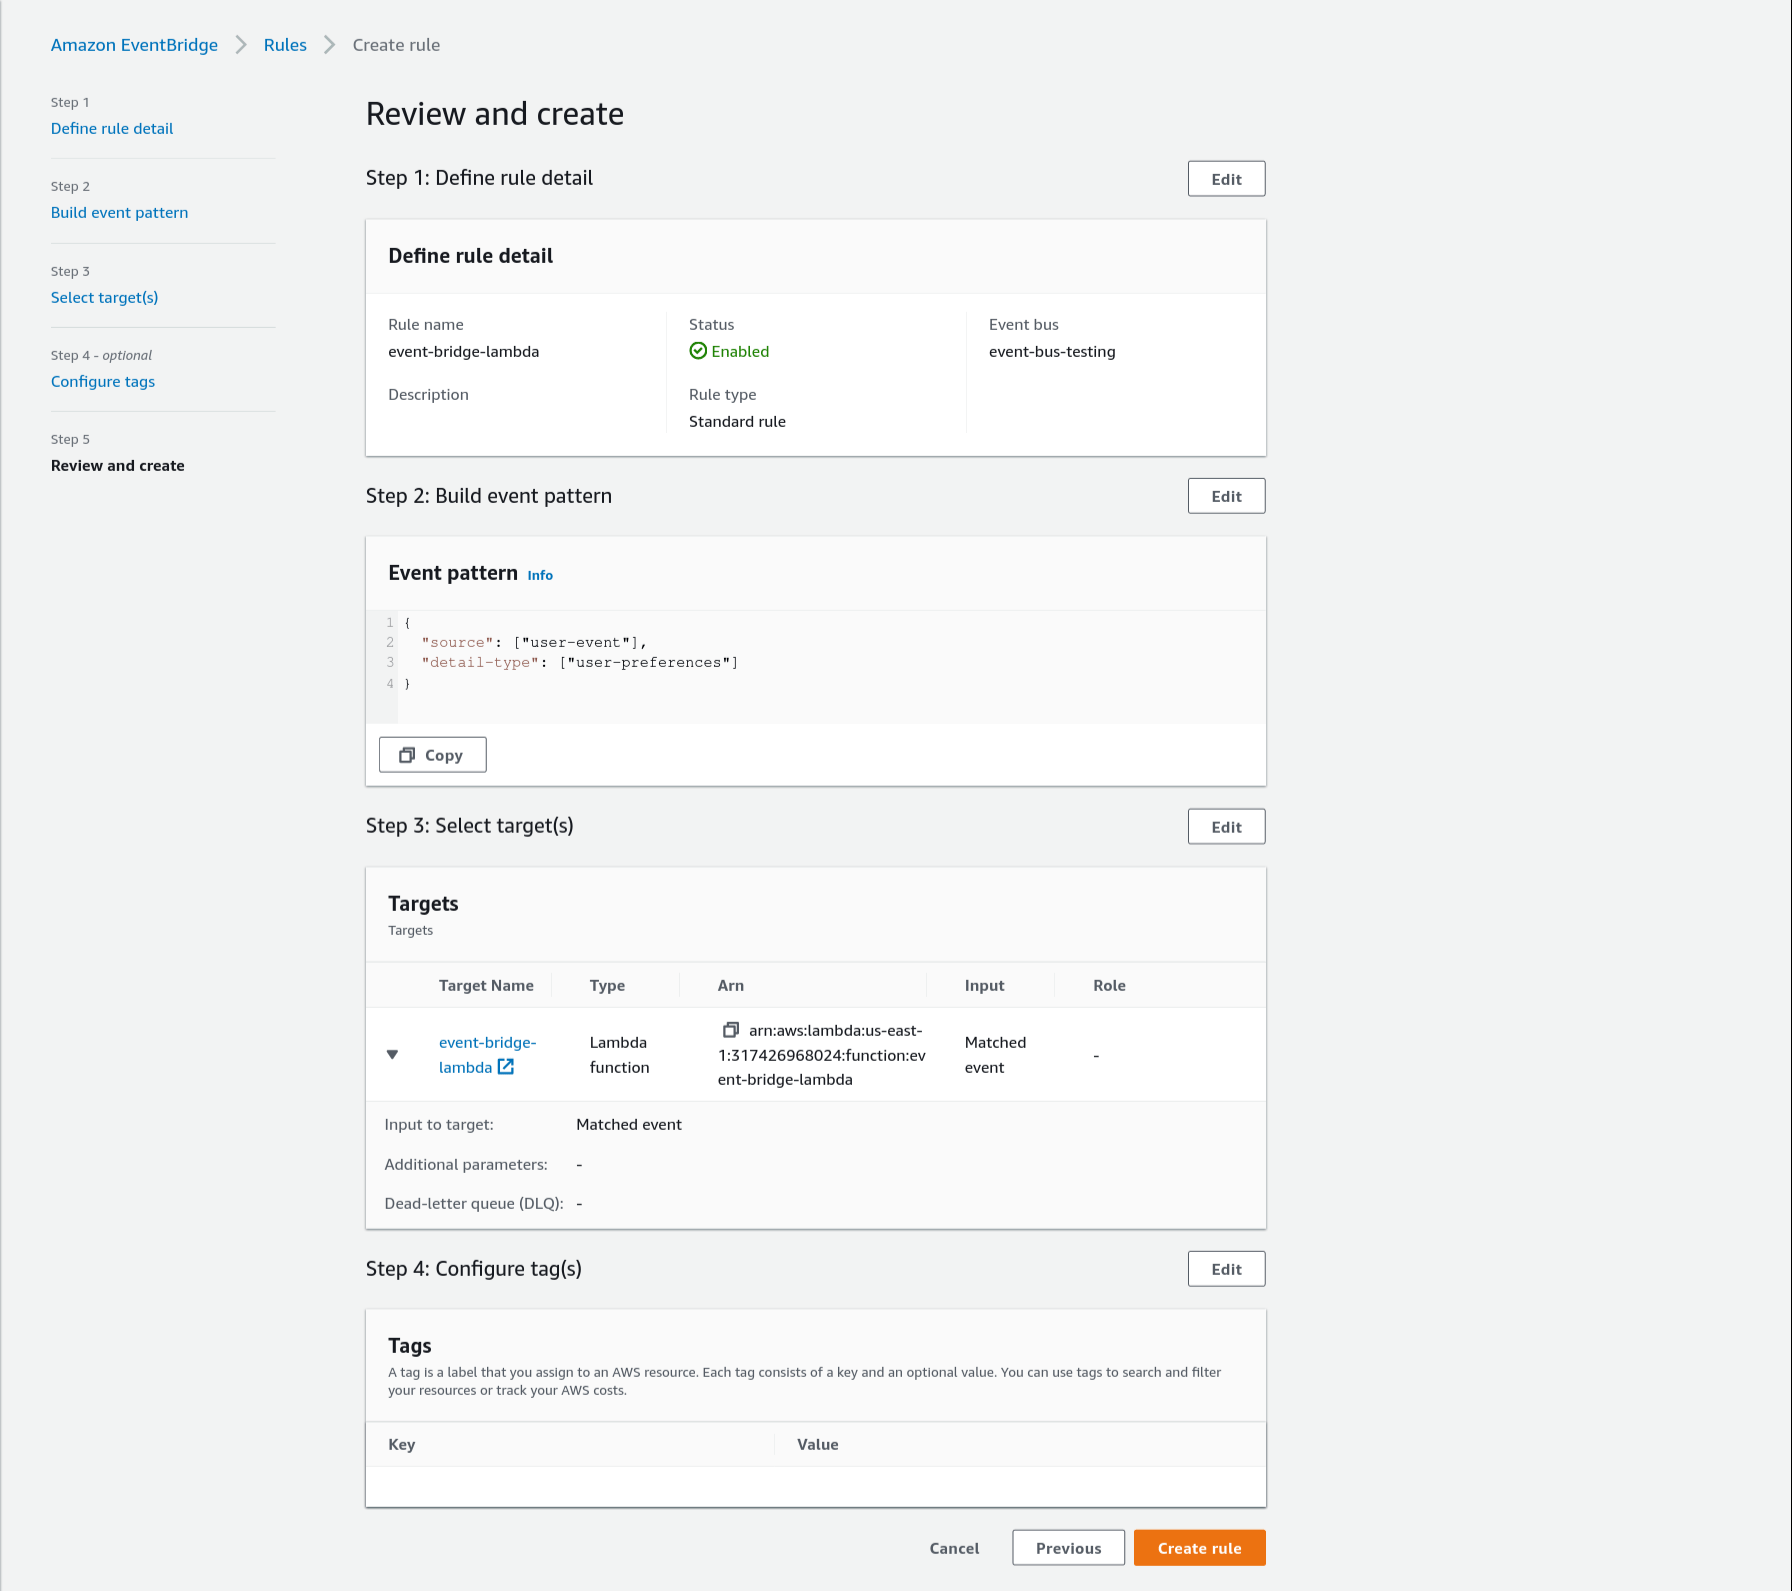
2. We’ll build one event bus, give it the name event-bus-testing, and then click the create button.
Step 4: Create Rule
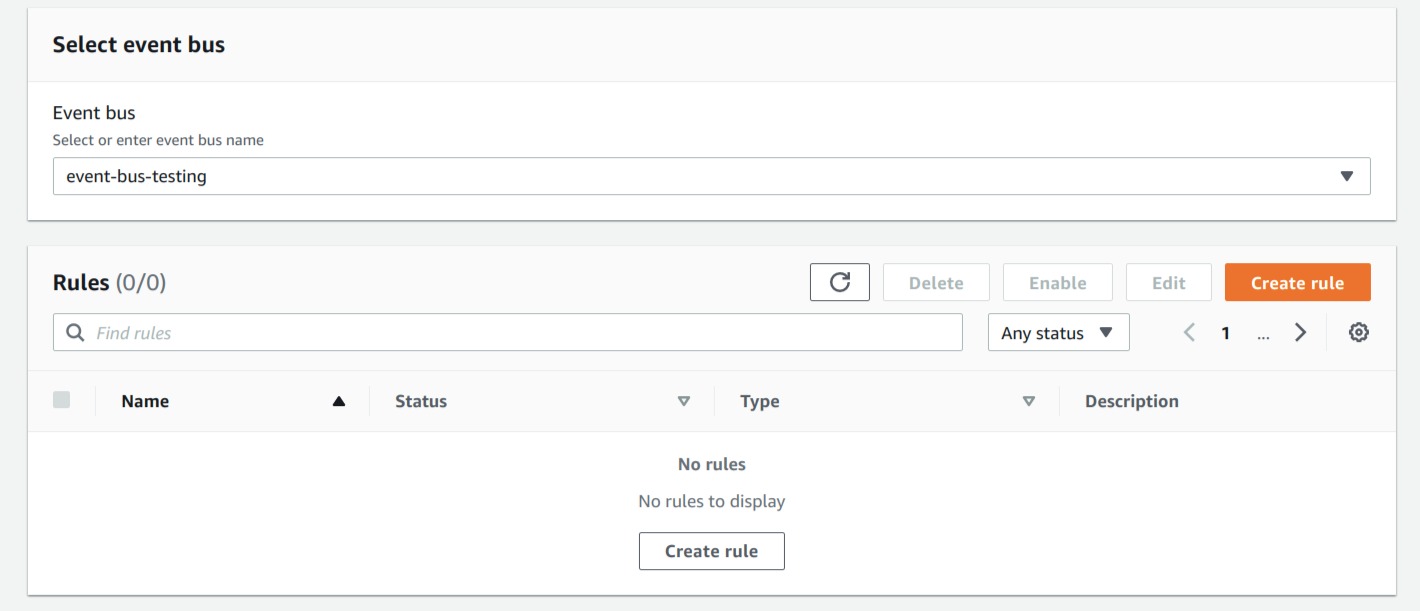
1. From the drop-down option, choose the event bus, which is event-bus-testing. We will discover that our custom event bus is empty of rules; click on new rules to add one.
2. Create a rule called “event-rule-testing” now. The next step is to choose a rule that has an event pattern in the defined pattern.

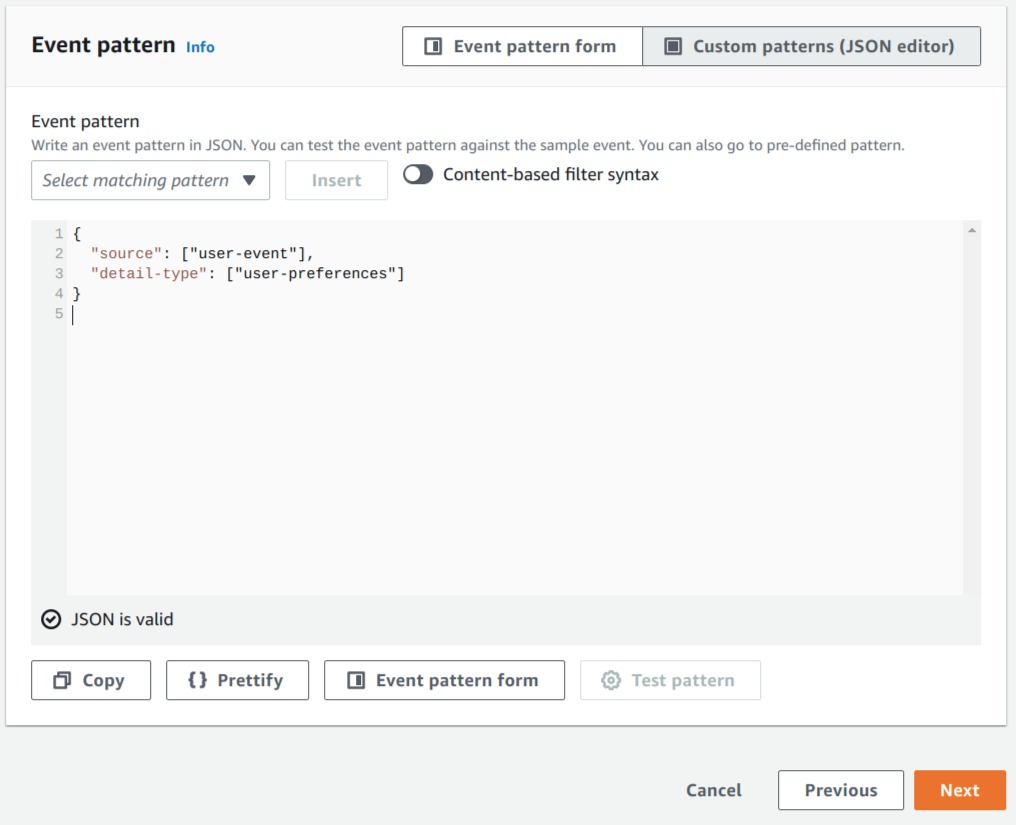
3. In the event pattern, write one custom pattern at the JSON editor area that is described in the python script.
{
“source”: [“user-event”],
“detail-type”: [“user-preferences”]
}
4. Next in the target section, Select a target from the drop-down menu that is the lambda function in our case. In the function area, choose the function “event-bridge-lambda” from the drop-down menu.
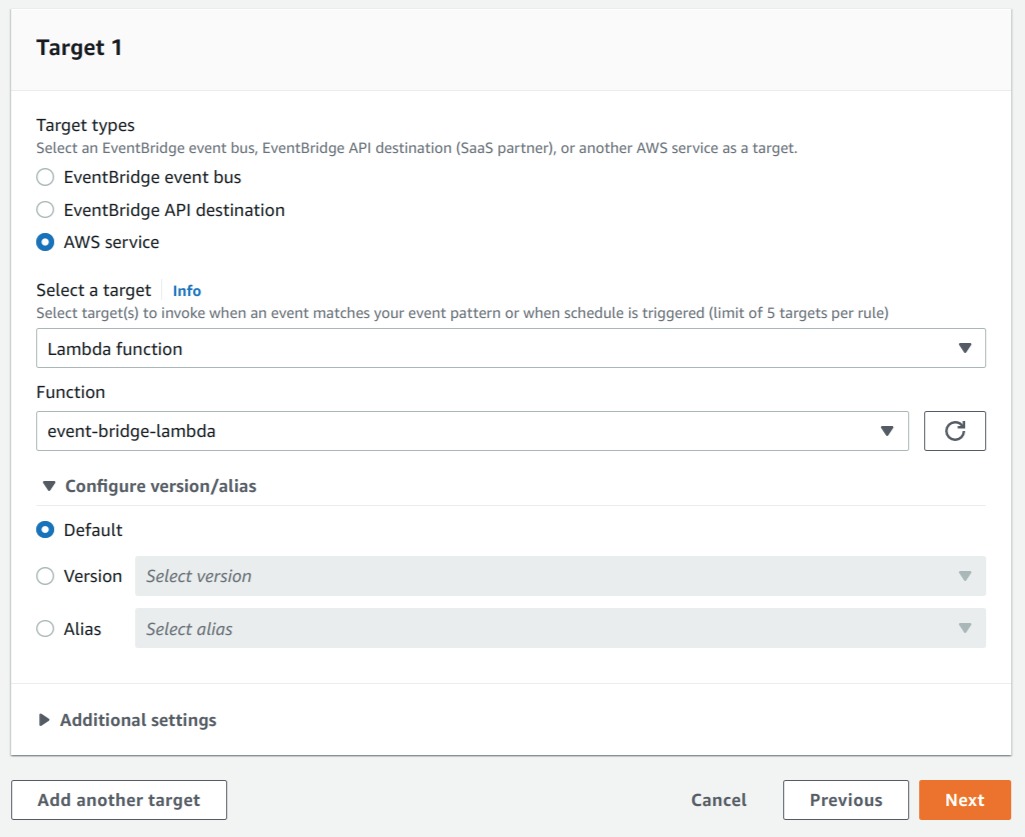
5. Next, on the review and create page, click on the create rule button.
Step 5: Running the application:
Execute the below command to run the application in your environment.
python3 eventBridge-start-stop.py
Conclusion:
This blog has walked you through the steps on how to use EventBridge as an interpretation tool to capture your custom events and use the Lambda function to control your AWS Instance status based on user-defined patterns.
Follow our Twitter and Facebook feeds for new releases, updates, insightful posts and more.
